Full Of Life, Vegan Connections
  • Home
    • Plant-Based or Vegan?
  • Recipes
  • Inspiration
    • Blog
  • In the Spotlight
  • About Me
    • Contact Me

Recipes

Straight to your Inbox

Subscribe

Cheezy Cashew Spread

7/31/2013

0 Comments

 
Picture
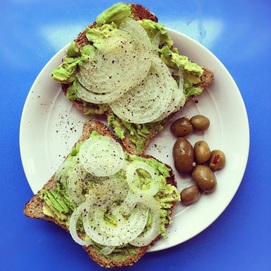
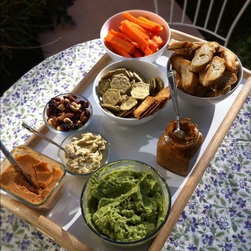
There's nothing like a good old fashioned vegan smorgasbord of homemade goodies. Though this snack tray pictured may be missing something sweet, it was loaded with lots of savory snacks and dips including hummus, guacamole, olive tapenade, and a cheezy cashew spread. 

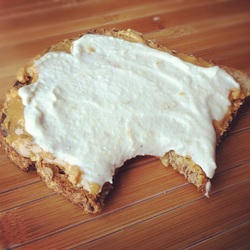
I love this flavourful and naturally coloured cheezy spread. It's delicious on rice crackers, homemade baguette crisps, Mary's Original crackers, carrots or with some nacho chips. It could also be the base for a nice sandwich or wrap.  Enjoy! 


Cheezy Cashew Spread 

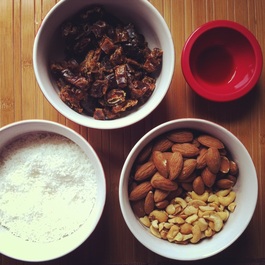
2 cups soaked cashews (in a bowl, add enough water to cover cashews and let sit for at least an hour; rinse and drain when they're finished soaking)
1 cup orange or red bell pepper, roughly chopped (about one medium pepper)
2 tbsp lemon juice
2.5 tbsp light miso
1 tsp onion powder
1.5 tsp garlic powder
1/2 cup nutritional yeast flakes
1/2 tsp salt if needed (but miso tends to be salty enough)

In a food processor, combine all ingredients and blend until smooth- the smoother the better. Put in a covered container and let sit in the fridge for a couple of hours or longer. The spread will become harder and nicely spreadable. 

Picture
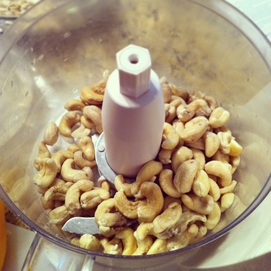
Soaked cashews ready to go.
Picture
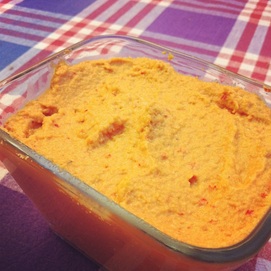
Cheezy spread awaiting some crackers.
0 Comments

Coconut Energy Balls

7/3/2013

2 Comments

 
Picture
'Energy balls' are always delicious and nutritious. They're so simple to make and play around with by adding different superfoods such as dried fruit, nuts, seeds, goji berries, chia, and so on. Though they're a nice treat at any time, there is one time in particular where energy balls are a must for me: while hiking. I love having a high-nutrient/energy fuel on hand that leaves no mess and is super easy to pack, grab and eat.

Unfortunately, being 9 months pregnant is limiting my hiking adventures. But that's not to say it's limiting others'. My boyfriend and his best friend, visiting all the way from Germany, are soon embarking on a week-long camping/hiking/road trip through Nova Scotia and Cape Breton. (Yes, I'm jealous.) To help them on their journey, I'm providing a few treats- Coconut Energy Balls, to start. 

Coconut Energy Balls
(makes  16 large balls)

1 cup (packed) chopped and pitted dates (I used Honey Dates which are easiest to find at my grocery store)
1 cup whole, unroasted almonds
1/2 cup cashews (mine were roasted and salted but unroasted/salted are great too)
1 cup unsweetened, dried coconut
1/2 tsp each vanilla and almond extract (or 1 tsp vanilla extract if you don't use almond)
1/4 tsp or 1/2 tsp salt

In a food processor blend up nuts until they are in fine pieces.
Add dates, coconut, extracts and salt and continue blending until the mixture falls away from the walls of the food processor. Check to see if it's ready by trying to form a ball with the mixture. If it's too dry it will crumble, but as the nuts release more oil, it will stick together. 

Transfer mixture to a large bowl and begin forming balls by squeezing mixture in the palm of your hand and rolling, or shaping balls. 

Picture
2 Comments

Coconut-Peanut Butter Blondies

11/19/2012

0 Comments

 
Picture
These squares of goodness were a happy accident. I pulled out all the ingredients in my cupboards that could aid to the making of some sort of cookie, and I ended up with a sort of brownie.. or, blondie in this case.

This recipe isn't yet perfect, even though the final product was, but that's what you get for baking free hand! I'll share what I've got in mostly estimated measurements but feel free to tweak what I've done and let me know if you hit on any good adjustments. If so, I'd love to hear about it below in the comment section! 

So, here she is! Coconut-Peanut Butter Blondies. 


Pre-heat your oven to 350F.
I used a non-stick 9x9 baking dish which didn't need to be greased.

1. In a small bowl, mix 3 tbsp ground flax seeds with 12 tbsp water.  Put aside for a few minutes to allow the flax to absorb some of the water.

2. In a big bowl mix together the following ingredients with a fork until uniform:
1/2 C room temperature (liquid) virgin coconut oil
1/2 C natural chunky peanut butter
3/4 C brown sugar
3 tbsp maple syrup
2 tbsp ground flax seeds with 4 tbsp water (mix together in a bowl first and allow to sit for a few minutes)
1 tsp vanilla
1/2 tsp salt 

3. In another bowl, mix the following dry ingredients together.
1/2 tsp baking soda
1/2 tsp baking powder
1/2 C coconut flour (Bob's Red Mill)
1/2 C quinoa flour (or other)

4. Mix dry into wet, combine, pour in baking dish and cook for 16 minutes.
*Mixture should be a little thick and not quite 'pourable'. Feel free to use your fingers to smooth it out into the corners of the pan.

5. Mix together the following ingredients for the topping.
1/3 C natural chunky peanut butter
1/3 C raw, unsweetened coconut flakes 
1/3 C icing sugar
1/4 tsp salt

6. After 16 minutes cooking time, take out the blondies from the oven and add crumble topping. Pat topping down into blondies and return to oven to cook for 3 more minutes.

7. Allow blondies to cool completely before cutting and serving. Before they are cooled they'll crumble. Store in the fridge. 

Enjoy! 


0 Comments

Toast and Toppings

11/10/2012

3 Comments

 
Picture
Instead of a recipe today, I'm offering some toast inspiration! So often I'm ooh-ing and aww-ing alone at the table while eating one of the world's most delicious open faced sandwiches, so it felt right to share. 

Of course toast and toppings don't really seem to fit into the 'recipe' category.  There is no recipe and you can't go wrong! But sometime we just need a little inspiration about what to eat next. As for my diet, I'm bound to eat something like this a couple of times a week for lunch. These days I've been making some great sandwiches too, even a triple-decker the other day!

So, where to start? Ezekiel Sprouted Grain Bread, that's where! Of course the choice is yours, but this is the only bread I buy. Made from whole ingredients, sprouted grains and lots of other goodies, there's no other bread like it. Admittedly, I like it because it's crispy when toasted and super healthy. I buy the grain and seed kind- in a blue bag. You buy it directly from the freezer at most stores, and from my freezer at home it goes straight into the toaster. I'm not a fan of it 'fresh' as it's a little try, but for toast- Winner!

Picture
As for toppings, I use some combinations of protein/fat, veggies and some flavour. More specifically- a mashed up avocado, hummus, a nut pate or a cheesy cashew spread. Then I go for veggies- spinach, tomato, cucumber, onions, cabbage, peppers, lettuce, sauteed mushrooms, etc. And always salt and pepper. The past few days I've also added olives, hot peppers, sundried tomatoes or something in that 'umph' category to give it a little extra zing. Of course I love Vegenaise as a spread for a sandwich and some sort of Dijon mustard. Olive oil and balsamic vinegar are also pleasing. Truly, the opportunities are endless and delicious. 

Now here's a few more pictures to get your sandwich creativity flowing! Enjoy!  
_______________________________________________________________________________

Picture
Spinach and cucumber with curry Vegenaise.
Picture
Hummus and sauteed porotbello mushrooms with parsley.
Picture
Avocado with salt and pepper mashed up.
3 Comments

Sweet Potato Fries with Curry Mayo 

9/16/2012

2 Comments

 
Picture
It's so interesting how 'comfort food' is simply a must at times. If we look at it, it most likely means that we're really just craving fat, carbs or salt... or sometimes all three. Such was the case yesterday, and for this, I give you... sweet potato fries with curry mayo.

Luckily at the Toronto Vegetarian Food Festival last weekend I scored two mini bottles of Vegenaise (delicious vegan mayonnaise). Yes, there are other vegan mayos on the market, but I must say that Vegenaise is a cut above the rest. *was not paid to say that   ;)

A few people asked me for the recipe for these fries, mentioning how they looked quite crispy. The truth is that although they're delicious, they're not that crispy.  But the recipe is still worth sharing.

Sweet Potato Fries with Curry Mayo
(Serves 2-3)

Preheat oven to 400F.

1 extra large sweet potato, or 4 small, sliced thickly
3 tbsp vegetable oil
3 tsp onion powder
3 tsp garlic powder
salt and pepper to taste

Toss the cut potato slices with oil and seasonings until evenly coated. Lay fries in a single layer on a baking sheet, careful that they're not touching others. Bake for 15 minutes, flip once (I use tongs to flip them), and continue baking for another 15 minutes. If fries are not yet brown and crispy looking, leave them in for a while longer. When finished, remove from oven and let cool for 5 minutes before moving them. 

Note: an extra step to assure crispier fries is to toss raw, cut fries in a couple tablespoons of cornstarch in a bag before adding oil and seasoning.  Shake fries in the bag vigorously to coat evenly with cornstarch.

Picture
Curry Mayo

Using just one sample size of Vegenaise (about 1/3 cup, as shown on left) I added 1 tbsp of curry powder and 2 tbsp of nutritional yeast. Prepare this ahead of time so the flavours  can marry. Enjoy with fries, on a sandwich or in a wrap. 


2 Comments

Banana-Parsley-Berry Smoothie

7/6/2012

2 Comments

 
Picture
The meal with which I begin my day often dictates my eating pattern for the rest of the day. In general, healthy choices lead to more healthy choices. My favourite way to break my overnight fast (12 hours between dinner and breakfast is optimal!) is with a fresh, cold smoothie. Starting my day off with a couple servings of fruit, one or two servings of veggies and some omega-3 fats, while staying full and energized for a few hours is my kind of breakfast.

The basis of all of my breakfast smoothies is: 1 ripe banana, 1-2 cups of greens (parsley, spinach, kale, lettuce), 1 cup of frozen fruit (blueberries, mixed berries, mixed tropical fruit, etc), 2 tbsp of high omega-3 fats (ground flax seeds, hemp hearts or chia seeds), and some liquid.

Banana-Parsley-Berry Smoothie
(makes 1 breakfast smoothie, 2 snack smoothies)

1 medium sized ripe/over-ripe banana 
1 cup mixed berries 
1 cup packed parsley, steams included
2 tbsp shelled hemp seeds (hemp hearts)
1 cup of cold water, or non-dairy milk (more if needed)

In a high powered blender, mix smoothie until uniform and all the berries are blended. 

Note: some blenders don't have the ability to liquify greens, especially kale. Experiment with your blender and find its limitations. Depending on your needs, it may be valuable to get a strong and efficient blender to continue using for smoothies, soups, cashew creams, and other sauces. 

2 Comments

Maple Cashew Cream

5/1/2012

0 Comments

 
Picture
Are you afraid of fat?? You should be! Unless you're talking about whole foods, plant based fats of course. ;)

Although fat is a high calorie nutrient, it is an extremely important one as a nutrient. The kind of fats you should be afraid of are ones that are nutritionally void, clog your arteries and lead to weight gain; those found in fast food, deep fried, and highly processed food, or animal products. Nuts, avocados and seeds are staples in my diet and provide me with healthy fats that keep me full, lower cholesterol, control my weight and balance my moods.  So am I afraid of fat? Not at all! 

I often prepare cashew based creams and sauces and this maple cashew cream is one that will add a satisfying sweetness on top of berries, over granola, to have on a dessert, or even on top of peanut butter, as pictured. 

Maple Cashew Cream 

1 cup blanched cashews (Soak them in water for 2 hours prior to using them in this recipe. This will soften them, and activate living enzymes and nutrients so they are easier to digest and offer more nutrition.)
1 or 2 Tbsp pure maple syrup
1/4 tsp vanilla extract
1/3 cup non dairy milk (more or less, just enough to get your blender to pureed the nuts)

Add soaked and drained cashews to a high speed blender along with maple syrup, vanilla and non dairy milk. Blend until silky smooth. You can store this in the fridge for a couple of weeks. 

0 Comments

Coconut-Nut 'Brownies'

3/15/2012

2 Comments

 
Picture
These bite-sized no-bake brownies are rich in nutrients with no added sugars. The only sweetener is dates, which in my life, means that they are great for breakfast, snacks or dessert. And a bonus, I found when I ate them directly from the freezer they were somehow twice as good! 

Coconut-Nut 'Brownies'

1/2 cup raw natural almonds
1/2 cup unsalted cashews 
3/4- 1 cup pitted, chopped dates
1 cup raw, unsweetened shredded coconut
3 tbsp coco powder 
1 tbsp coconut oil (optional)
1 tsp vanilla
1/4 tsp salt

In a food processor, add the almonds and cashews and blend until finely ground. Add the dates and coconut and pulse until mixed in. Then add the remaining ingredients and blend until crumbly but not too oily. Shape by hand into balls, or press firmly into a square dish, pushing to one side (fills about half a square cake pan). Leave to set in the fridge for about half an hour. The longer they rest, the more the coconut flavour comes out. 

This snack is vegan and gluten-free.

2 Comments

    Categories 

    All
    Breakfasts
    Desserts
    Dressings Spreads And Dips
    Meals
    Powerhouse Nutrition
    Salads
    Snacks